Preface
 I have an old laptop – Lenovo ThinkPad Edge 11, manufactured between 2011-2013, which I use about 6 weeks in a year. With recent OS it becomes a slowpoke, even with 500GB 7200RPM hard drive. so I run into dilemma – what to do next, replace or upgrade. Basically laptop is very good, excellent keyboard, good ergonomics, satisfactory screen. Intel Dual Core i3 380UM 1.3GHz by no means is a speed demon, yet it is not a main bottleneck. Since it is rarely used, I opted for 2nd option.
Hard Drive Replacement
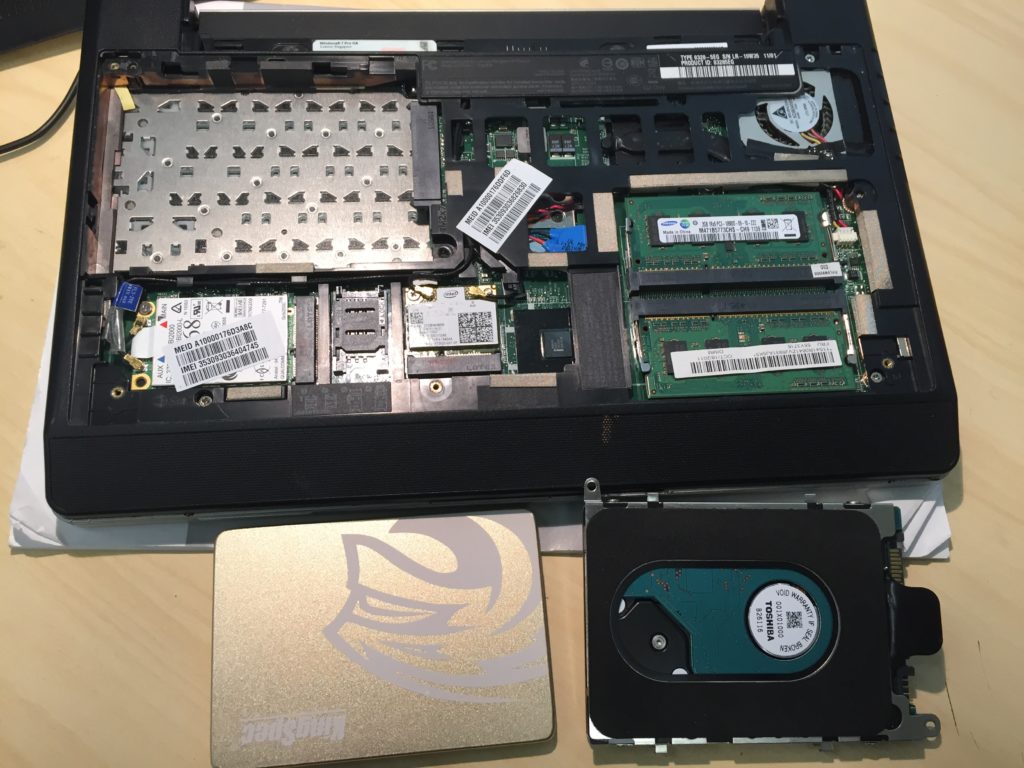
Rotating hard drive is a main bottleneck in most today’s PC systems. From my past experience replacement of conventional hard drive with SSD turns old PC into a new one for conventional everyday tasks, not involving massive 3D graphics, 4K ultra HD video or CPU/GPU intensive rendering. For this laptop I’m bought el-cheapo KingSpec 512GB TLC SSD from Aliexpress (priced at 70 Euro with shipping in September 2018). In the past, when purchasing laptop, I selected the one not with only satisfactory technical specification and affordable price, but also which can be easily disassembled. Installing new SSD involved only removing only few screws and pulling out bottom plate (see photos).
I run some speed tests:
SuSE Linux Tumblweed 64bit (October 2018 snapshot) startup with MATE desktop;
launch of LibreOffice with large spreadsheet;
launch of LTSpice electronic circuit simulator under WINE;
startup of Windows 7 under VirtualBox emulator.
YouTube video can be seen here.
Tasks which were previously annoyingly time consuming now are quite snappy. Unfortunately, no one can jump higher then his own head, laptop is able to play smoothly 1080p HD videos, yet 1440p playback is choppy, 2160p turns basically into a slide show.
| Lenovo ThinkPad Edge 11 opened and with old hard drive removed |
 |
Activating BFQ scheduler
BFQ (budget fair queuing) kernel scheduler allows much better GUI response under heavy IO loads, especially on relatively slow/old systems. This is done by means of assigning certain budget to the amount of traffic to each block device within each scheduling cycle. Algorithm is pretty complex and smart, details go beyond scope of this article. Here is how to activate it on Linux system.
1) Add scsi_mod.use_blk_mq=1 to the kernel boot parameters.
2) Create/edit config file /etc/udev/rules.d/61-bfq-scheduler.rules
### Rule start ###
#SSD
ACTION=="add|change", KERNEL=="sd[a-z]", ATTR{queue/rotational}=="0", ATTR{queue/scheduler}="bfq"
#Rotating
ACTION=="add|change", KERNEL=="sd[a-z]", ATTR{queue/rotational}=="1", ATTR{queue/scheduler}="bfq"
### Rule end ###
3) Restart system. Run this in terminal as root:
cat /sys/block/sdxxx/queue/scheduler
If everything is OK, then output will look like this:
mq-deadline kyber [bfq] none
For SuSE Linux in particular full article available here.
Reconditioning Battery
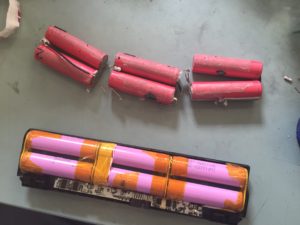
Battery was almost dead, with only 45 minutes of useful time. Original batteries still available but are old (stocked for many years) and expensive, Chinese replacements from eBay and Aliexpress had questionable quality, so I opened battery cage and found industry standard 6 pcs of 18650 Li-ion elements (18650 means form-factor – diameter 18mm, length 65mm). These were replaced with higher capacity Samsung INR18650-35E 3500mAh 3.7V which in a pack of 6 could yield 77.8 W/h.
 This was quite tedious task, cage had to be opened with sharp blade. Batteries are connected with wires and metal ribbon, soldered with spot weld. Without spot weld machine in my workshop, Li-ion elements need to be soldered very very quickly, otherwise they will be damaged with overheating. Hint – use high-quality efficient no-clean liquid flux like ChipQuik in squeeze battle or syringe.
Good news – battery working. Bad news – it is not working as expected. Even after re-calibration with Lenovo utility, OS still recognizes old 57W/h capacity instead of new 77.8 W/h. Battery has EPROM chip inside which theoretically could be re-programmed and re-flashed, yet it simply wasn’t worth in this case. In short – with continuous (endless loop, maximum screen brightness) VideoLAN video playback battery life is about 2 hours 30 minutes. With lower CPU/GPU load it will probably extend to 3.5 hours.
Hacking Linux OS into New Battery Capacity
I did some measures in order to trick SuSE Linux Leap 15 to see new battery capacity. Battery related values are now stored in /sys/class/power_supply/BATx (where BATx may be BAT0 or BAT1 depending on your system).
cat /sys/class/power_supply/BAT0/capacity_full_designwill show your battery capacity. There are no corresponding /etc/systcl.conf values, so logical solution would be (as root):
chmod u+w /sys/class/power_supply/BAT0/capacity_full_design
echo 77800000 > /sys/class/power_supply/BAT0/capacity_full_design
Unfortunately, it doesn’t work, write permissions denied, even chattr can’t be used:
lsattr: Inappropriate ioctl for device While reading flags on
Following advices on forums, tried to change this with udev values. Wrote udev rules in /etc/udev/rules.d
ACTION=="add|change", KERNEL=="BAT*", SUBSYSTEM=="power_supply", ATTR{energy_full_design}="*", MODE="0664"
ACTION=="add|change", KERNEL=="BAT*", SUBSYSTEM=="power_supply", ATTR{energy_full_design}="77800000"
then run
udevadm control --reload; udevadm trigger; cat /sys/class/power_supply/BAT0/energy_full_design 47520000 # still old valueTested what went wrong:
udevadm test /sys/devices/LNXSYSTM:00/LNXSYBUS:00/PNP0C0A:00/power_supply/BAT0
--->
ATTR '/sys/devices/LNXSYSTM:00/LNXSYBUS:00/PNP0C0A:00/power_supply/BAT0/energy_full_design' writing '77800000' /etc/udev/rules.d/62-adjust-battery-capacity.rules:5
error opening ATTR{/sys/devices/LNXSYSTM:00/LNXSYBUS:00/PNP0C0A:00/power_supply/BAT0/energy_full_design} for writing: Permission denied
OK, possibly it is fixable if udev rules will be loaded into initramfs. Included my custom udev rules into initramfs, edited /etc/dracut.conf.d/my-udev-battery.conf
install_items+="/etc/udev/rules.d/62-adjust-battery-capacity.rules”its there – “dracut -vf” logs succesful inclusion. Unfortunately
cat /sys/class/power_supply/BAT0/energy_fullstill displays old value. Even tried to add grub boot parameter power_supply.energy_full_design=77800000, no luck.
Running out of known options, I left this culprit as is with old battery capacity as is.
If someone knows a solution, please e-mail to![]()
Leave a Reply
You must be logged in to post a comment.